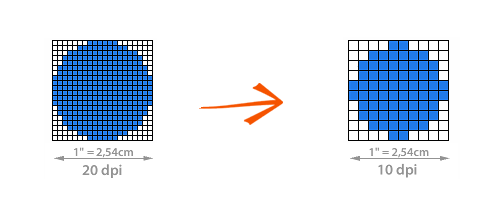
The number of dots per inch (DPI) or pixels per inch (PPI) of an image define its resolution and, hence, its quality. Some people think DPI and PPI are one and the same thing, but if you want to be truly accurate, you should know the former refers to the resolution of a printed image, whereas the latter refers to what you see on screen.
Do you always have to change the DPI of your photographs and images in order to improve their quality? Certainly not. The answer to this question depends on what you plan to do with the image. If you plan to send it by e-mail, post in online on your website or share it in your Facebook profile, the standard 72 DPI resolution used by most digital cameras will be just fine. However, if you want to print the photograph or include it in a calendar, a professional portfolio, a magazine or a book, then your desktop publisher will most likely ask for a higher DPI. Depending on the requirements of the printing office or of the editor, you will need to change the DPI to 300 or even 600.
If you think changing the DPI for a photo album is a daunting task for an unprofessional, requiring a series of repetitive tasks and the use of an advanced image editing software such as Adobe Photoshop (which is not always easy to find, can be expensive and not exactly easy to use), we have some good news for you! reaConverter Lite — a freeware tool — can help you change the DPI of several images at once by following a few easy steps.
Install reaConverter Lite
Download and install the free edition of reaConverter from reaconverter.com:
It will only take you a few minutes and not too much space on your computer. And in a few more minutes, you will get acquainted to its easy-to-use interface.
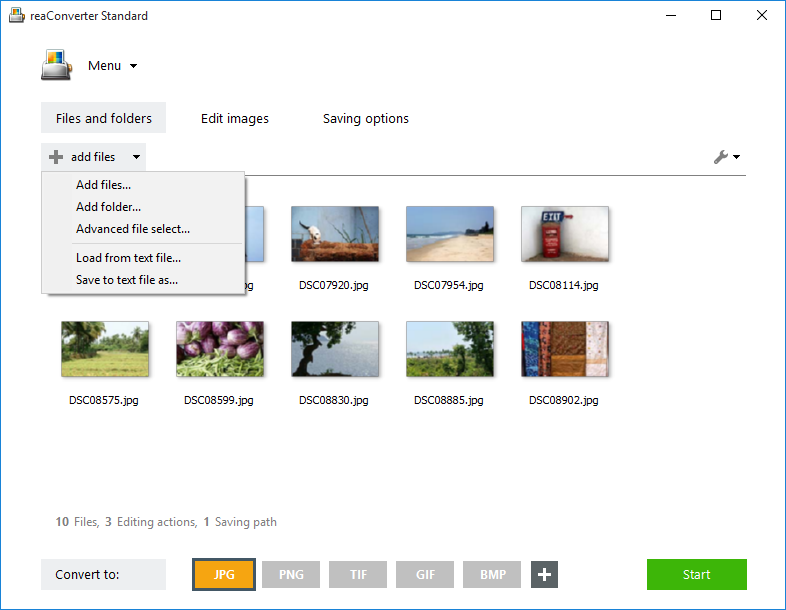
Load your images into reaConverter
Select all the images you want to change the DPI to and add them to the list of files which are about to be converted.
Set DPI values
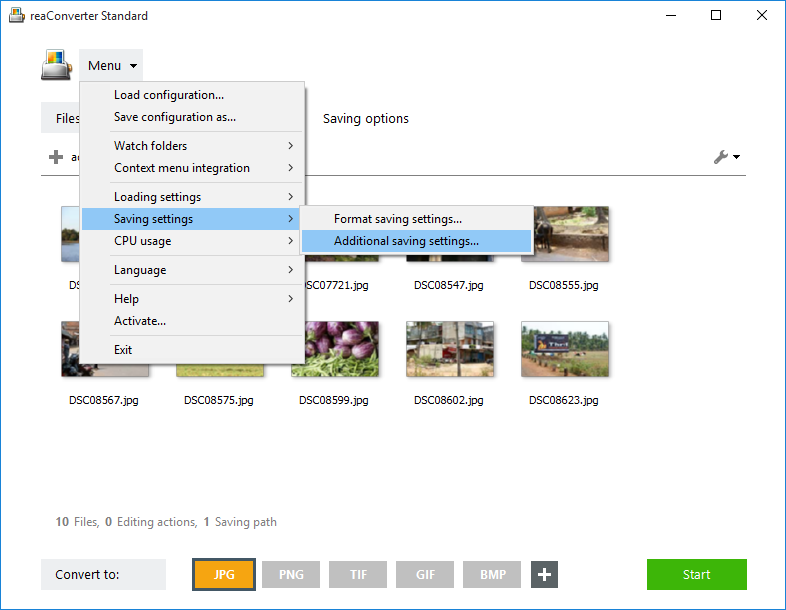
Go to the Menu button and click Saving settings → Additional saving settings
Here you will find the DPI tab, where you can opt for using the DPI values of the original image files during conversion, or for entering new values for the output files.
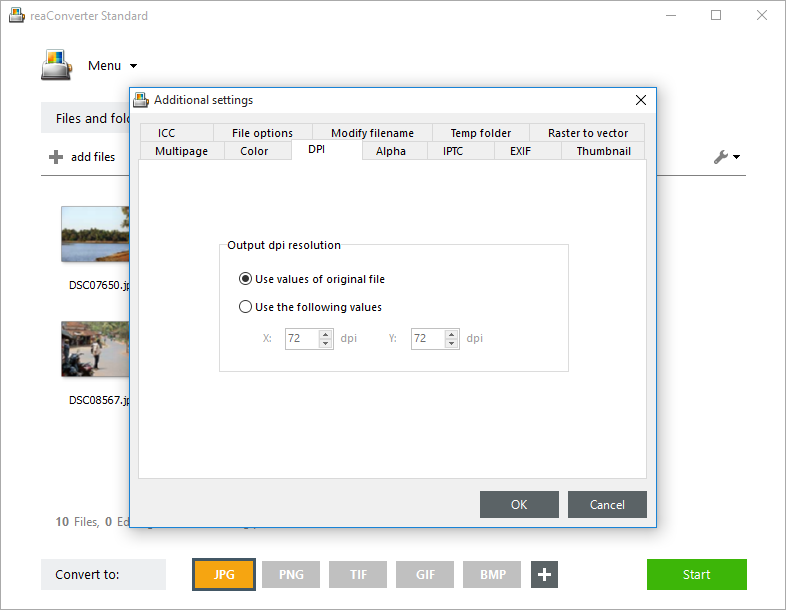
Change the value of the DPI for all the loaded images. Press OK and go the final step.
Apply DPI Settings and Save Your Result
In the Saving options tab, you can choose the destination folder and the output format of your files.
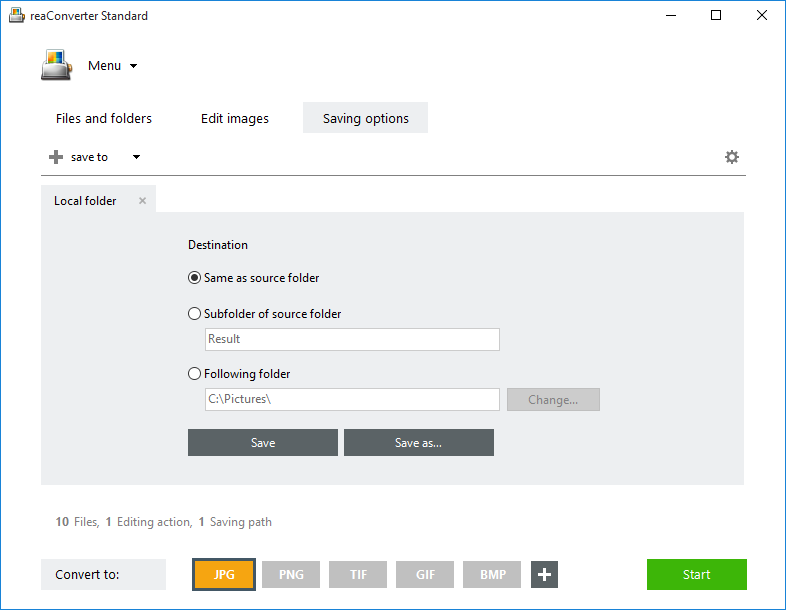
Then simply press the Start button and you will soon be able to use your images with the desired DPI. Fast, Easy and Free!
Advanced users can change DPI via command line interface, watch folders or DLL in automated mode. You are welcome to contact our technical support when you have any questions about reaConverter.