Do you have a scanned drawing, a map or some other type of raster image that you would like to turn into a DWG or DXF vector? Supporting most existing raster formats as input files, reaConverter makes this process easier than ever and provides you with a handy scaling tool too.
Vectorization can be done using the two available methods: outlining (creating lines / curves along the borders of linked pixels) or centerlining (generating lines / arcs along the center of linked pixels). And because vector files can contain drawings at any scale set by the designer, when you convert from raster reaConverter allows you to pick the desired scaling unit for the output DXF or DWG image. Available options are: millimeters (set as default), inches and pixels.
DWG is a proprietary format of Autocad — one of the most widely used pieces of software in the architecture, engineering and design industry. DXF is its interchange variant, meant to ease transfer, print and interoperability with other software. Converting to DWG or DXF greatly increases the amount of editing options, allowing you to handle the image using lines, points, curves and layers. And now the process no longer requires a computer-aided design program installed on your computer, but the fast and user-friendly reaConverter.
Load Raster Images
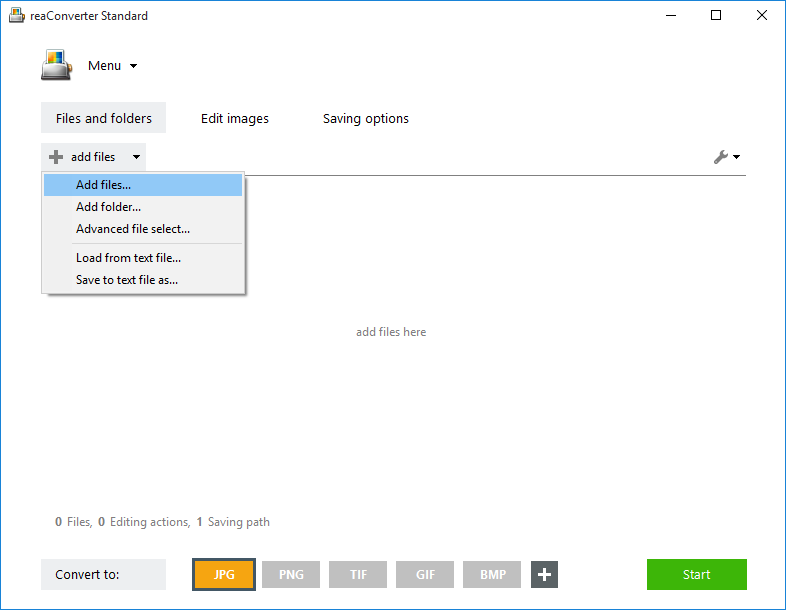
Load one or more raster files you intend to convert. From BMP, PNG and JPG to GIF and TIF, reaConverter supports an impressive number of input formats. Pick the files manually, add entire folders or add selected extensions automatically, using the Advanced file select tool.
Set Default Units
Go to the Menu button and then to Saving settings → Raster to vector conversion
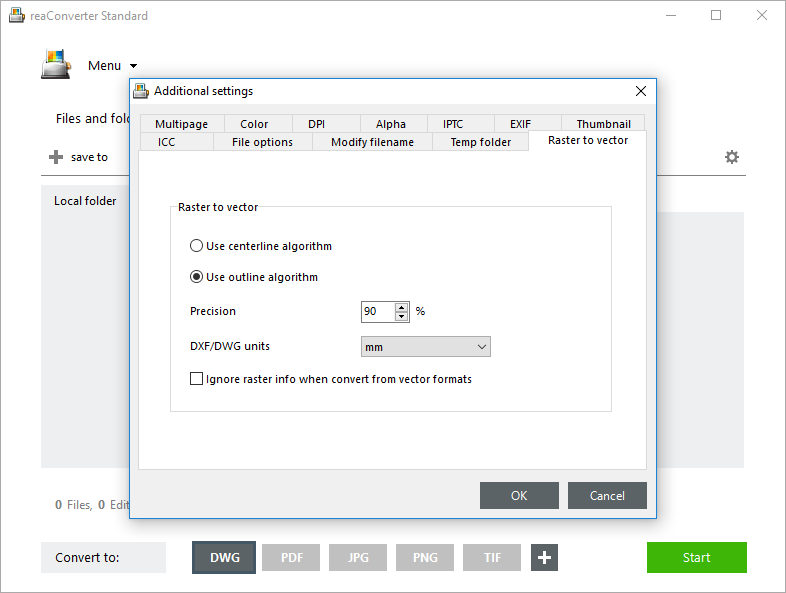
Here you can pick the vectorization algorithm you intend to use and set the default unit for the output DWG/DXF files: millimeters, inches or pixels.
Apply Image Editing
Optionally, you can use the Edit images tab to increase vectorization quality with one or more options.

For example, you can turn your images into Black&White and Remove Black&White Noise. This two options can dramatically increase vectorization quality.
Save the Result
In the Saving options tab, choose the location and format of the output files. reaConverter lets you save either locally, in the source folder or another desired location. Next, pick DWG or DXF from the buttons placed in the lower part of the window. In case you don’t see them there, click the Plus button and you will see a list with all output formats supported by reaConverter.
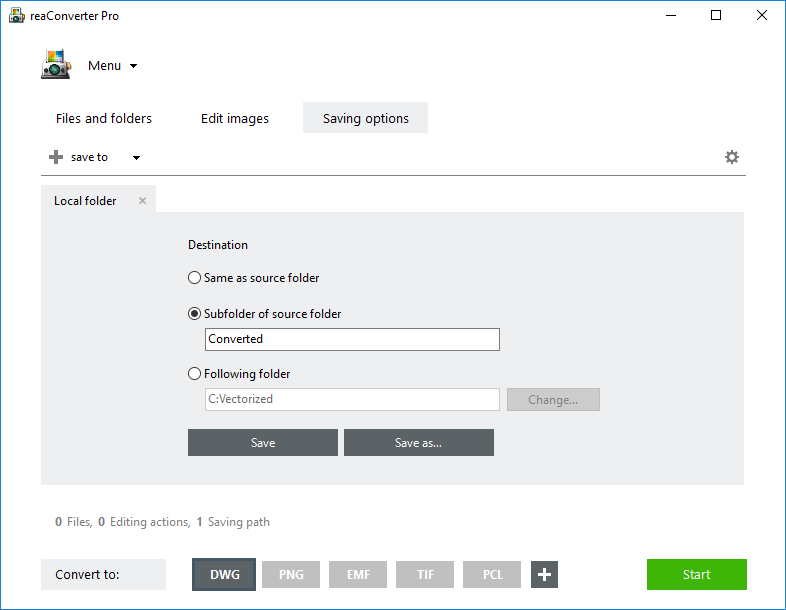
Choose your format from the list and then simply press Start
Video Tutorial
Command Line Tool and DLL
Developers can include this feature when creating a customized solutions by operating it via command-line, using the following code line:
cons_rcp.exe -s "source_file.png" -o "output_file.dwg" -dxf_dwg_units 1
Where
-dxf_dwg_units = DXF/DWG units (1 - mm, 2 - inches, 3 - pixels (scale = 1))
You are welcome to contact our technical support when you have any questions about reaConverter.