Primitive Drawings

How to Watermark Images with Drawings?
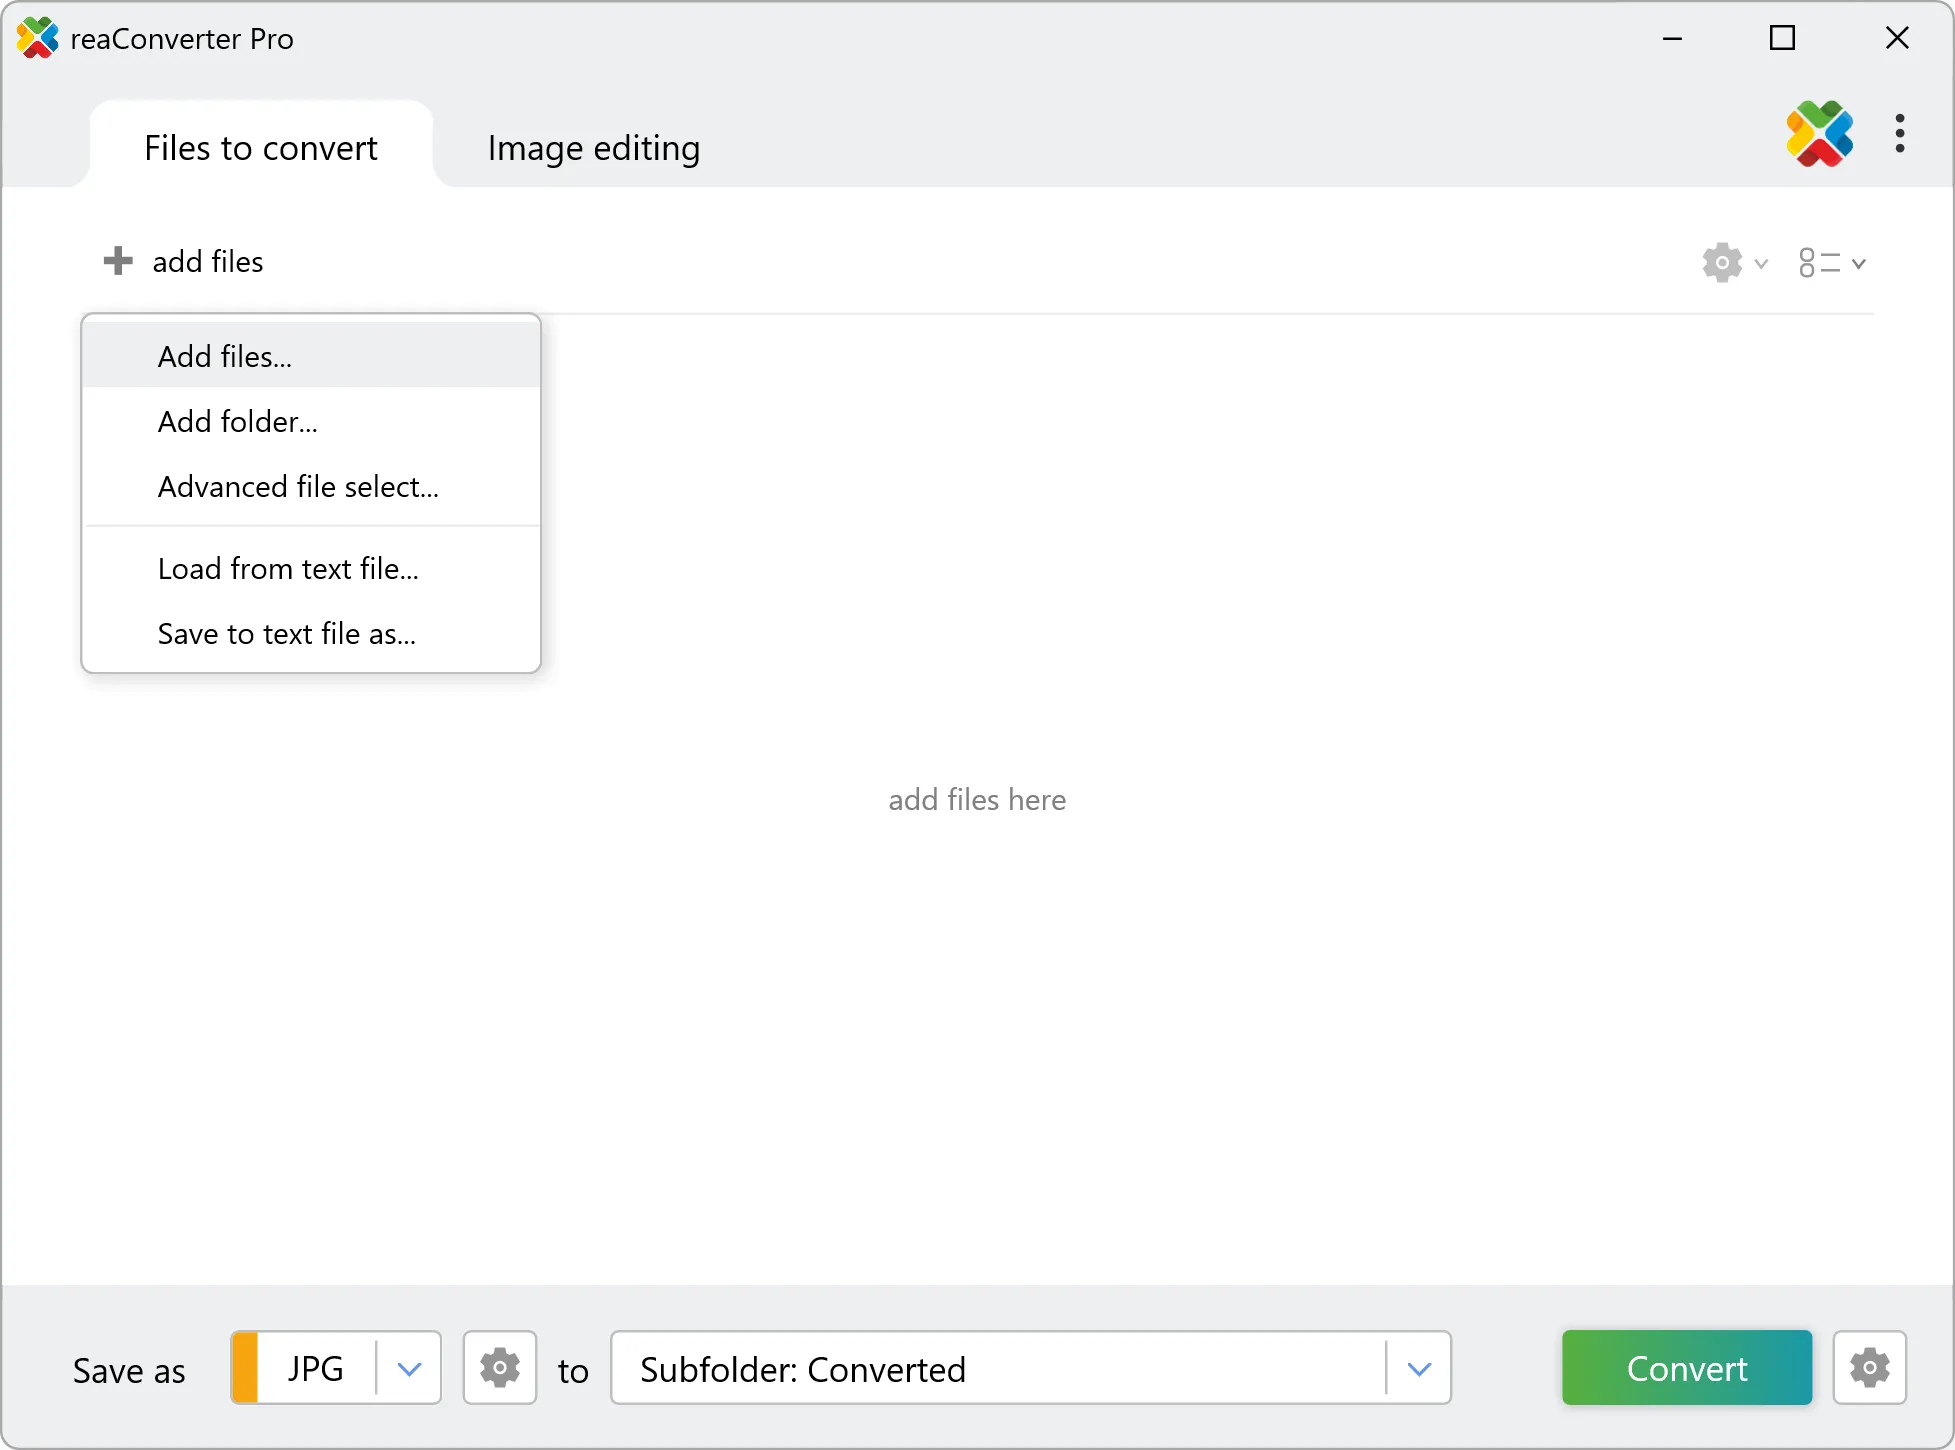
1. Open Images
Add one or several images to reaConverter. Use the file browsing tool or drag-and-drop them directly into the software window.
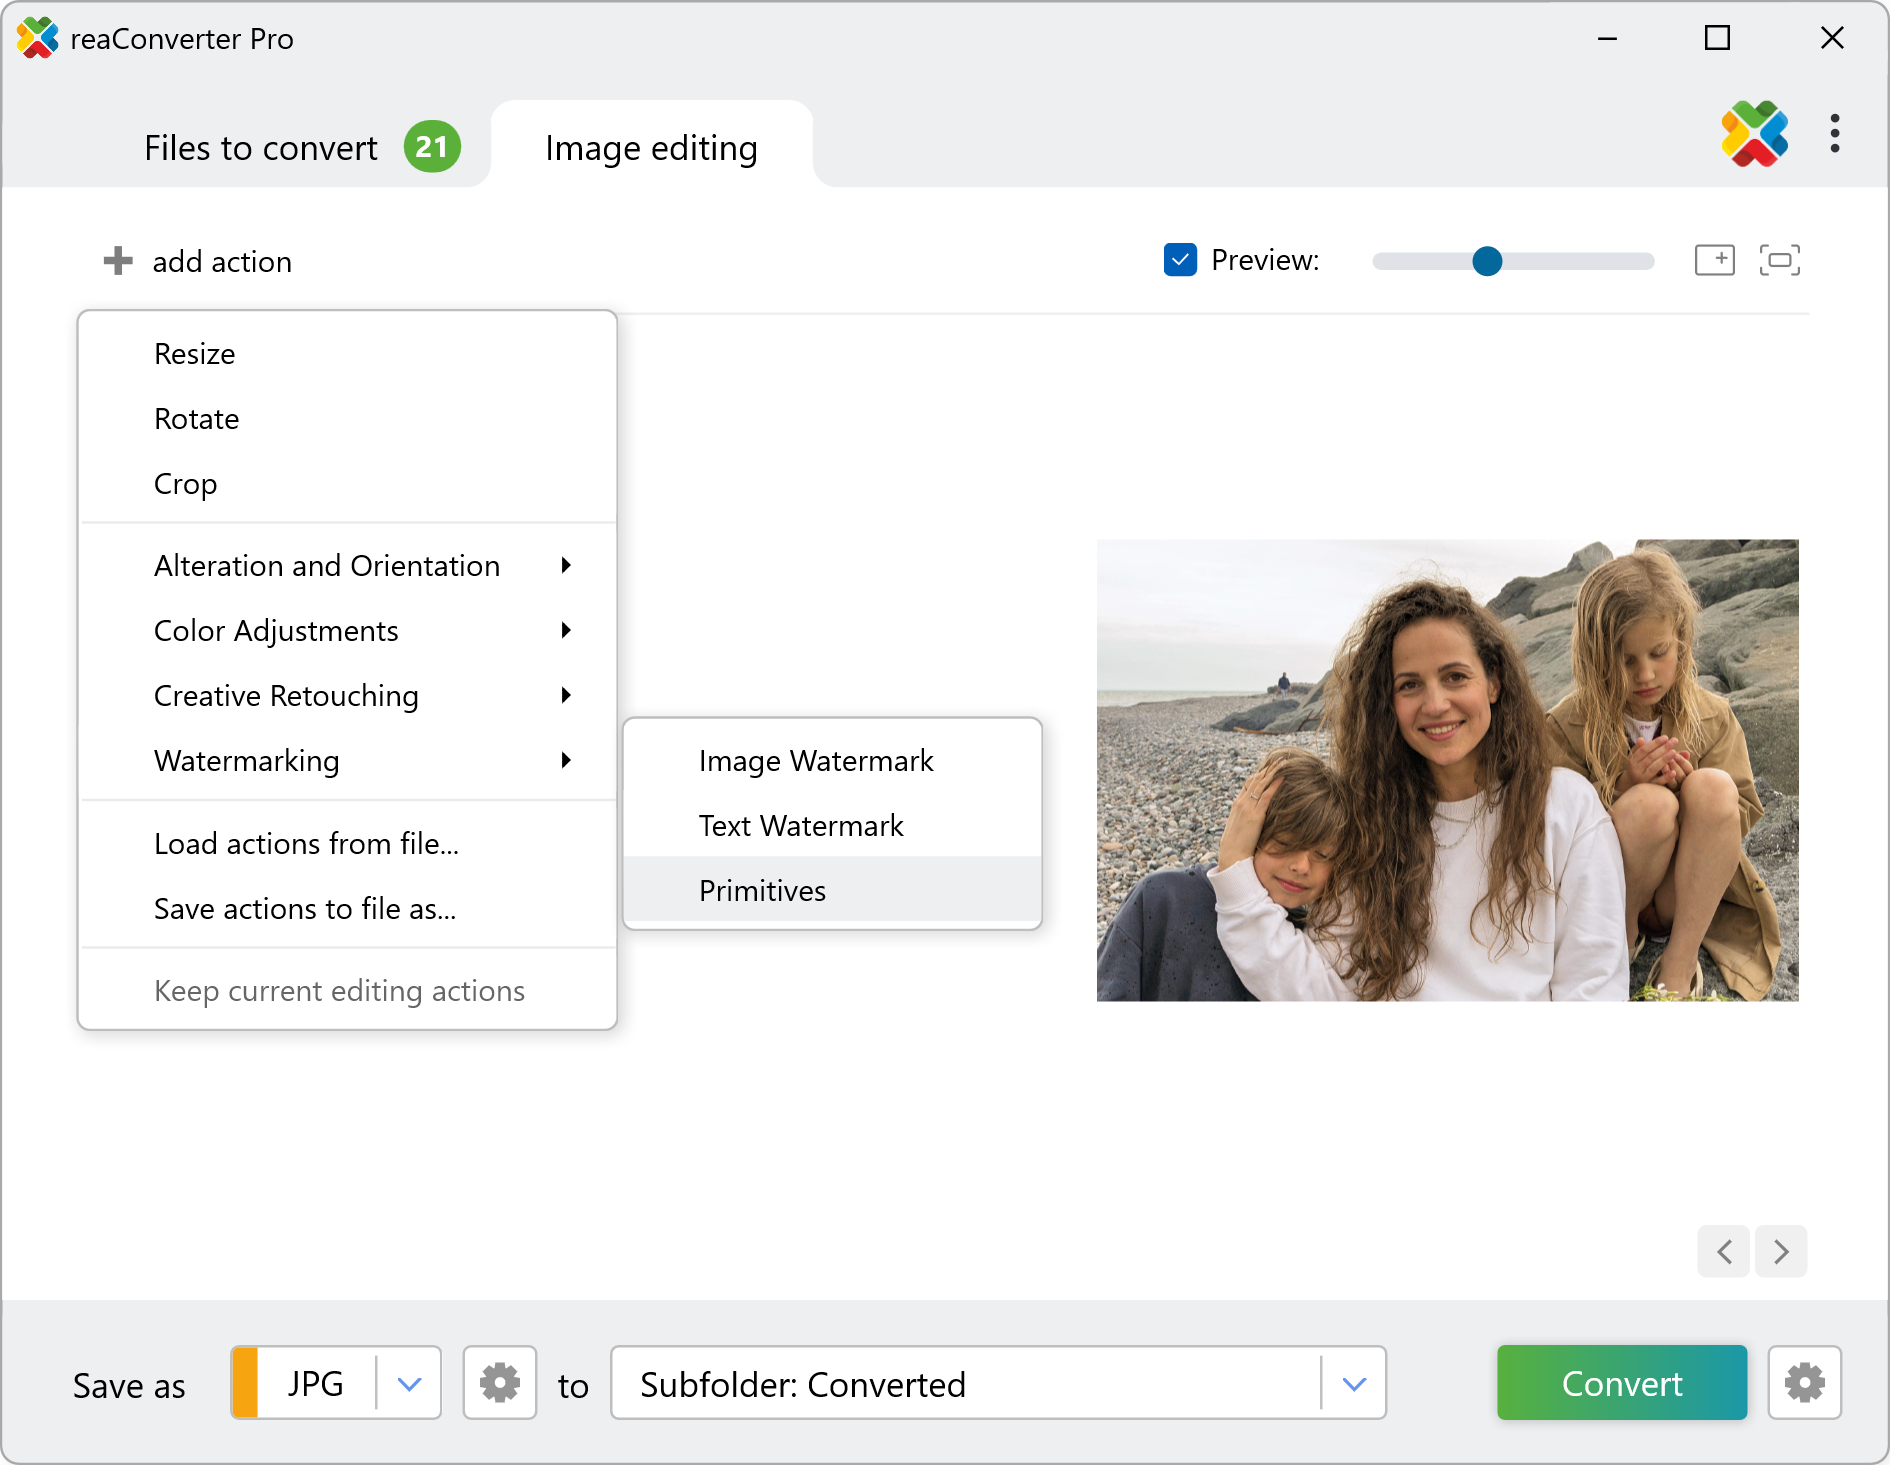
2. Add Primitives Action
Go to Image editing, click the Add action button and then Watermarking. Here, pick the Primitives option.
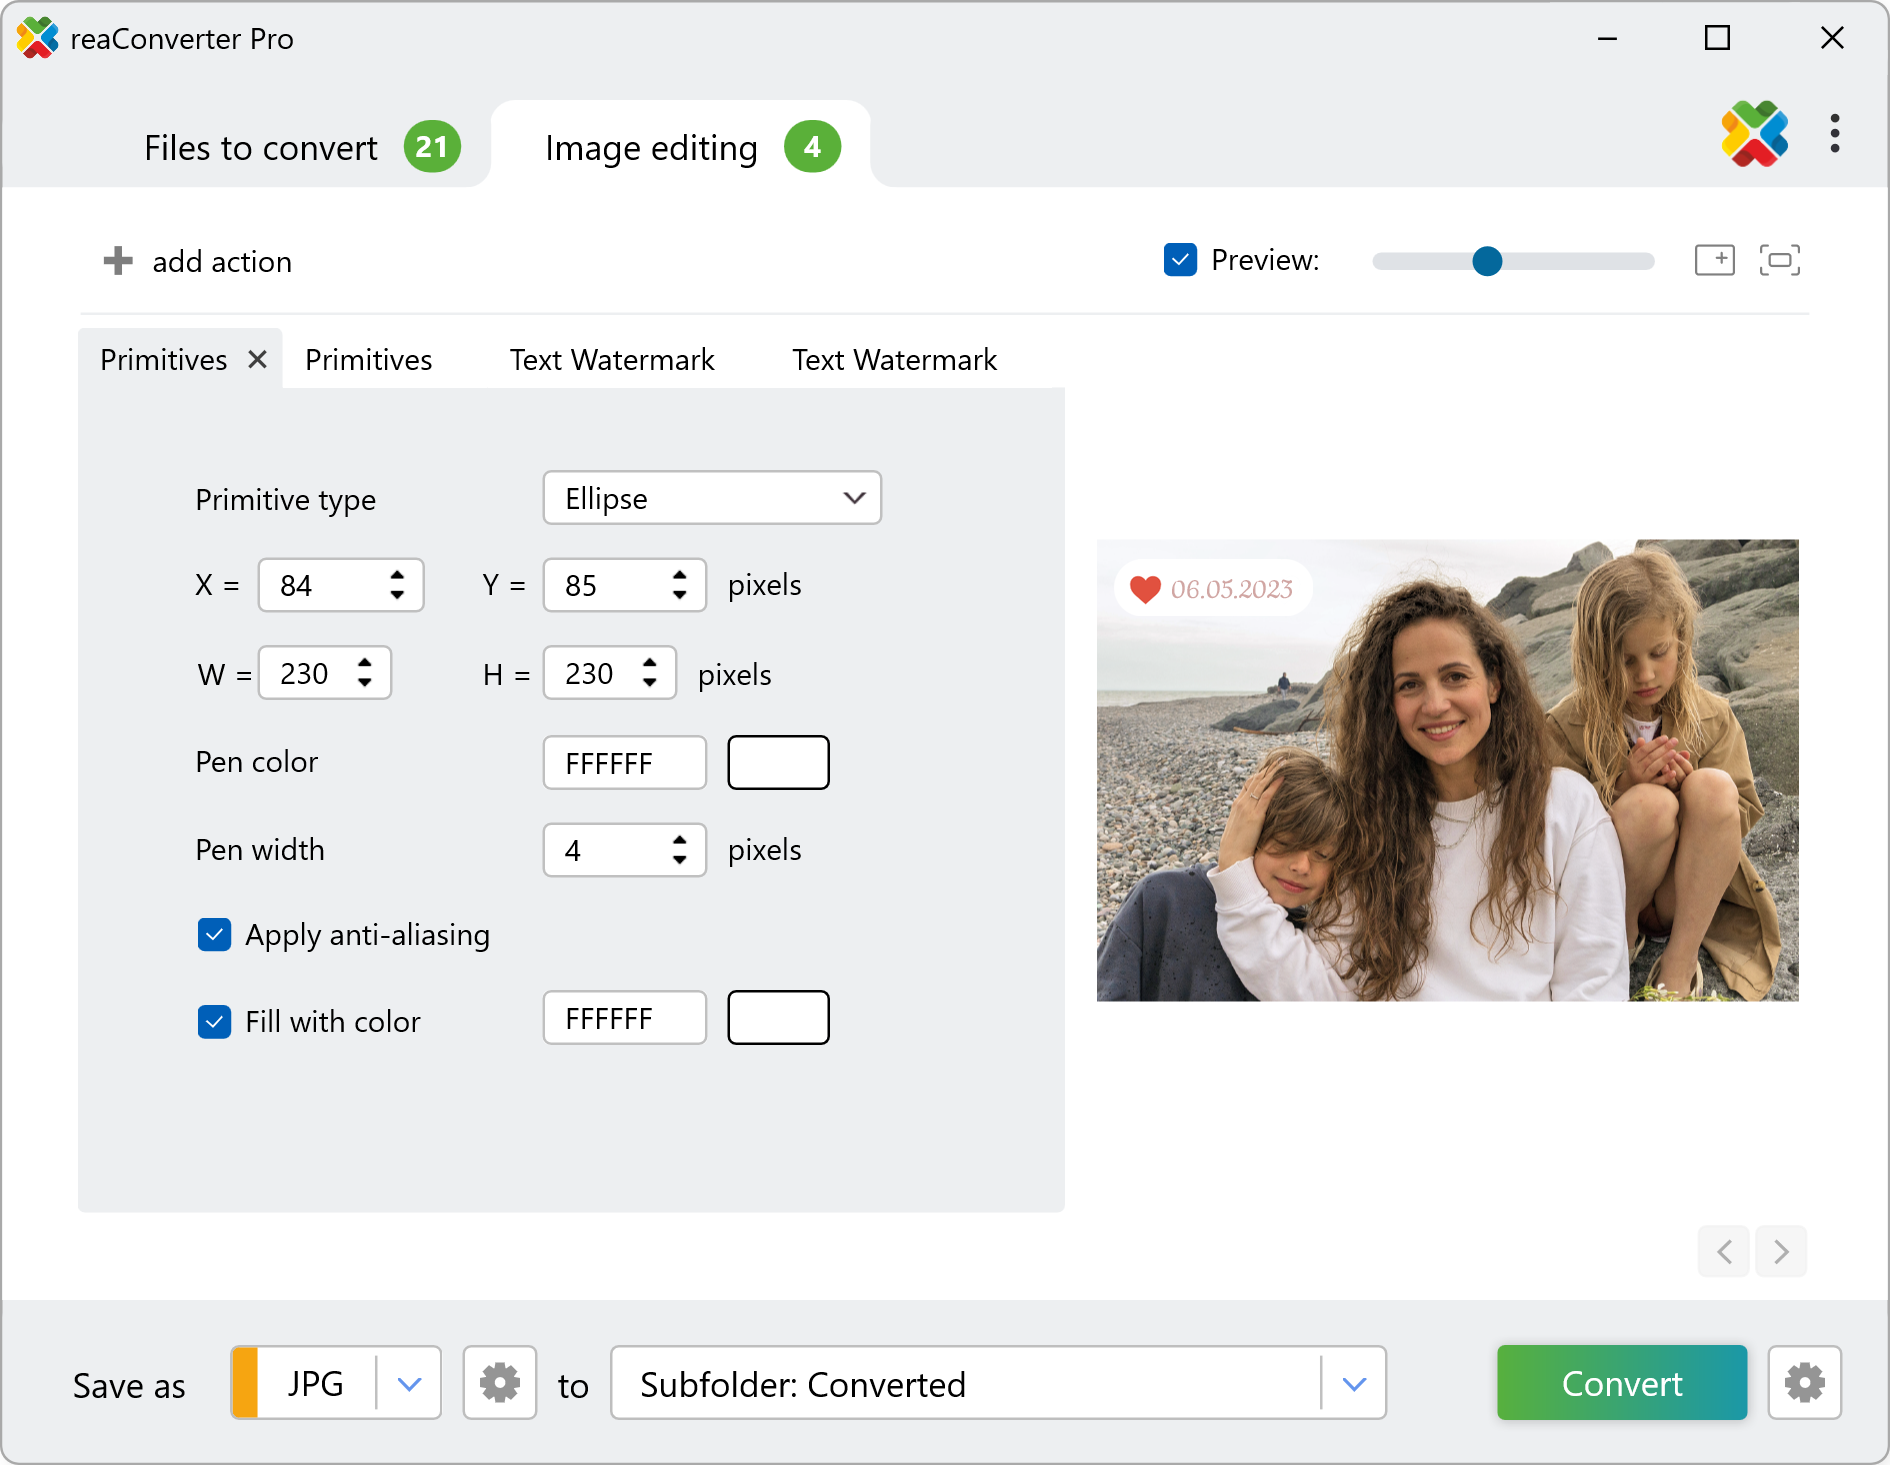
Next, choose the type of primitive drawing you intend to use — point, line, rectangle or ellipse, and then customize it accordingly. You can then change the coordinates of its location, its color and width, as well as fill it with color and apply anti-aliasing. The result of your selections can be easily checked in real time, by ticking the Preview button, in the upper right part of the window.
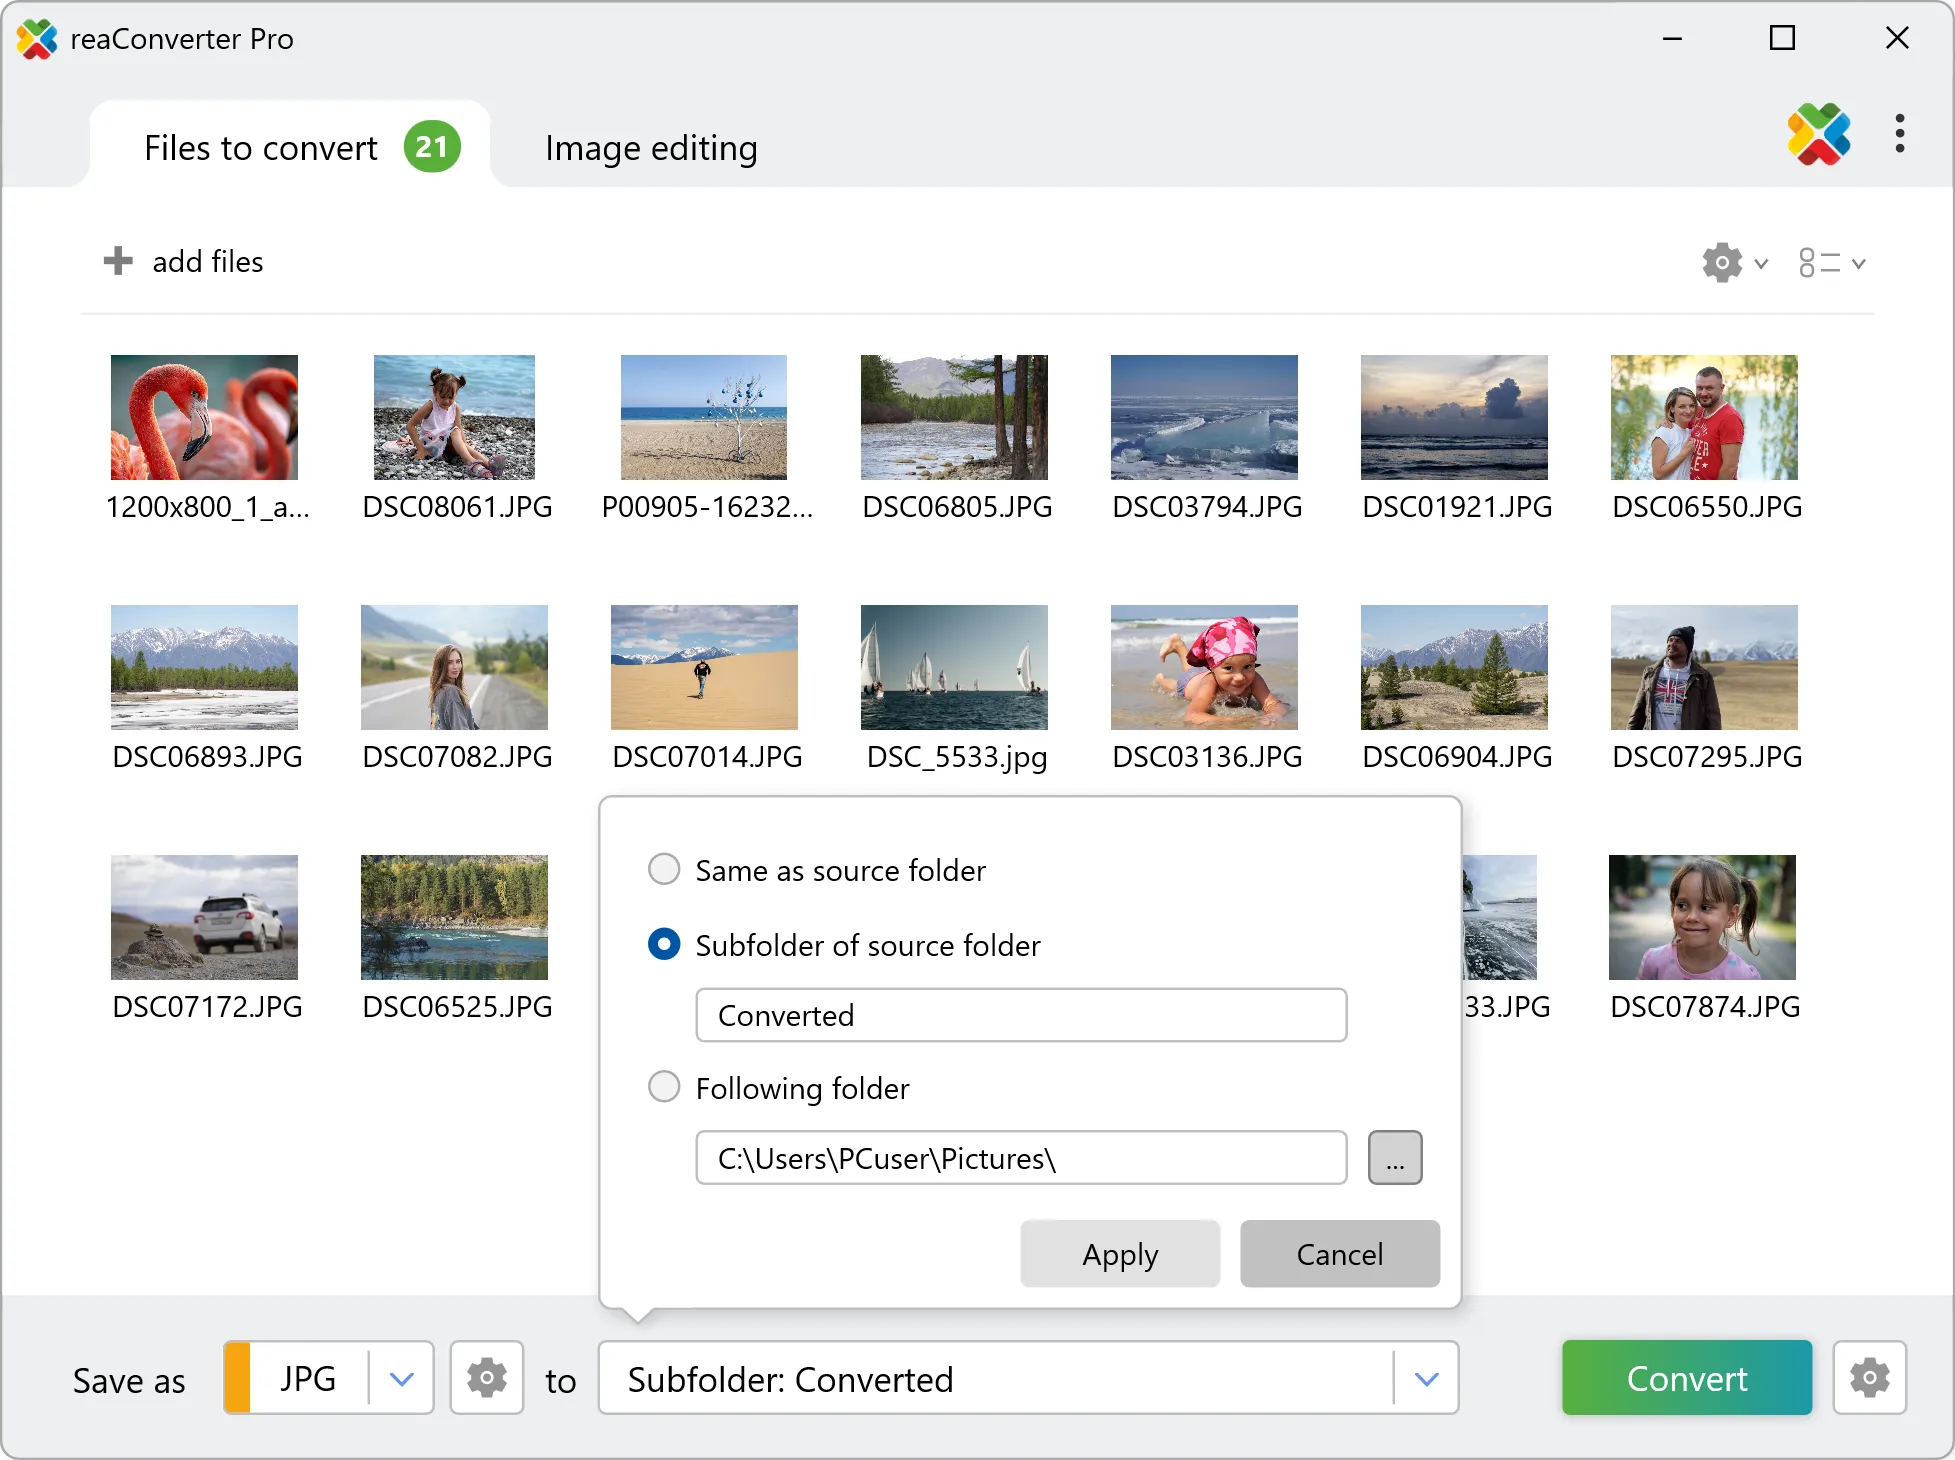
3. Save the Result
Finally, pick the location and format of your watermarked images.
Click the Convert button and your new images will soon be ready.
Watermark images on your PC
The fast and easy way to place a drawings on your images is to use reaConverter. The software operates completely offline, keeping your files safe and private.
Draw primitives with command-line tool
You can also draw on images using command-line , either manually or through automated scripts. reaConverter Pro includes a command-line tool called cons_rcp.exe — an advanced feature designed for professional use, available exclusively in the Pro edition.
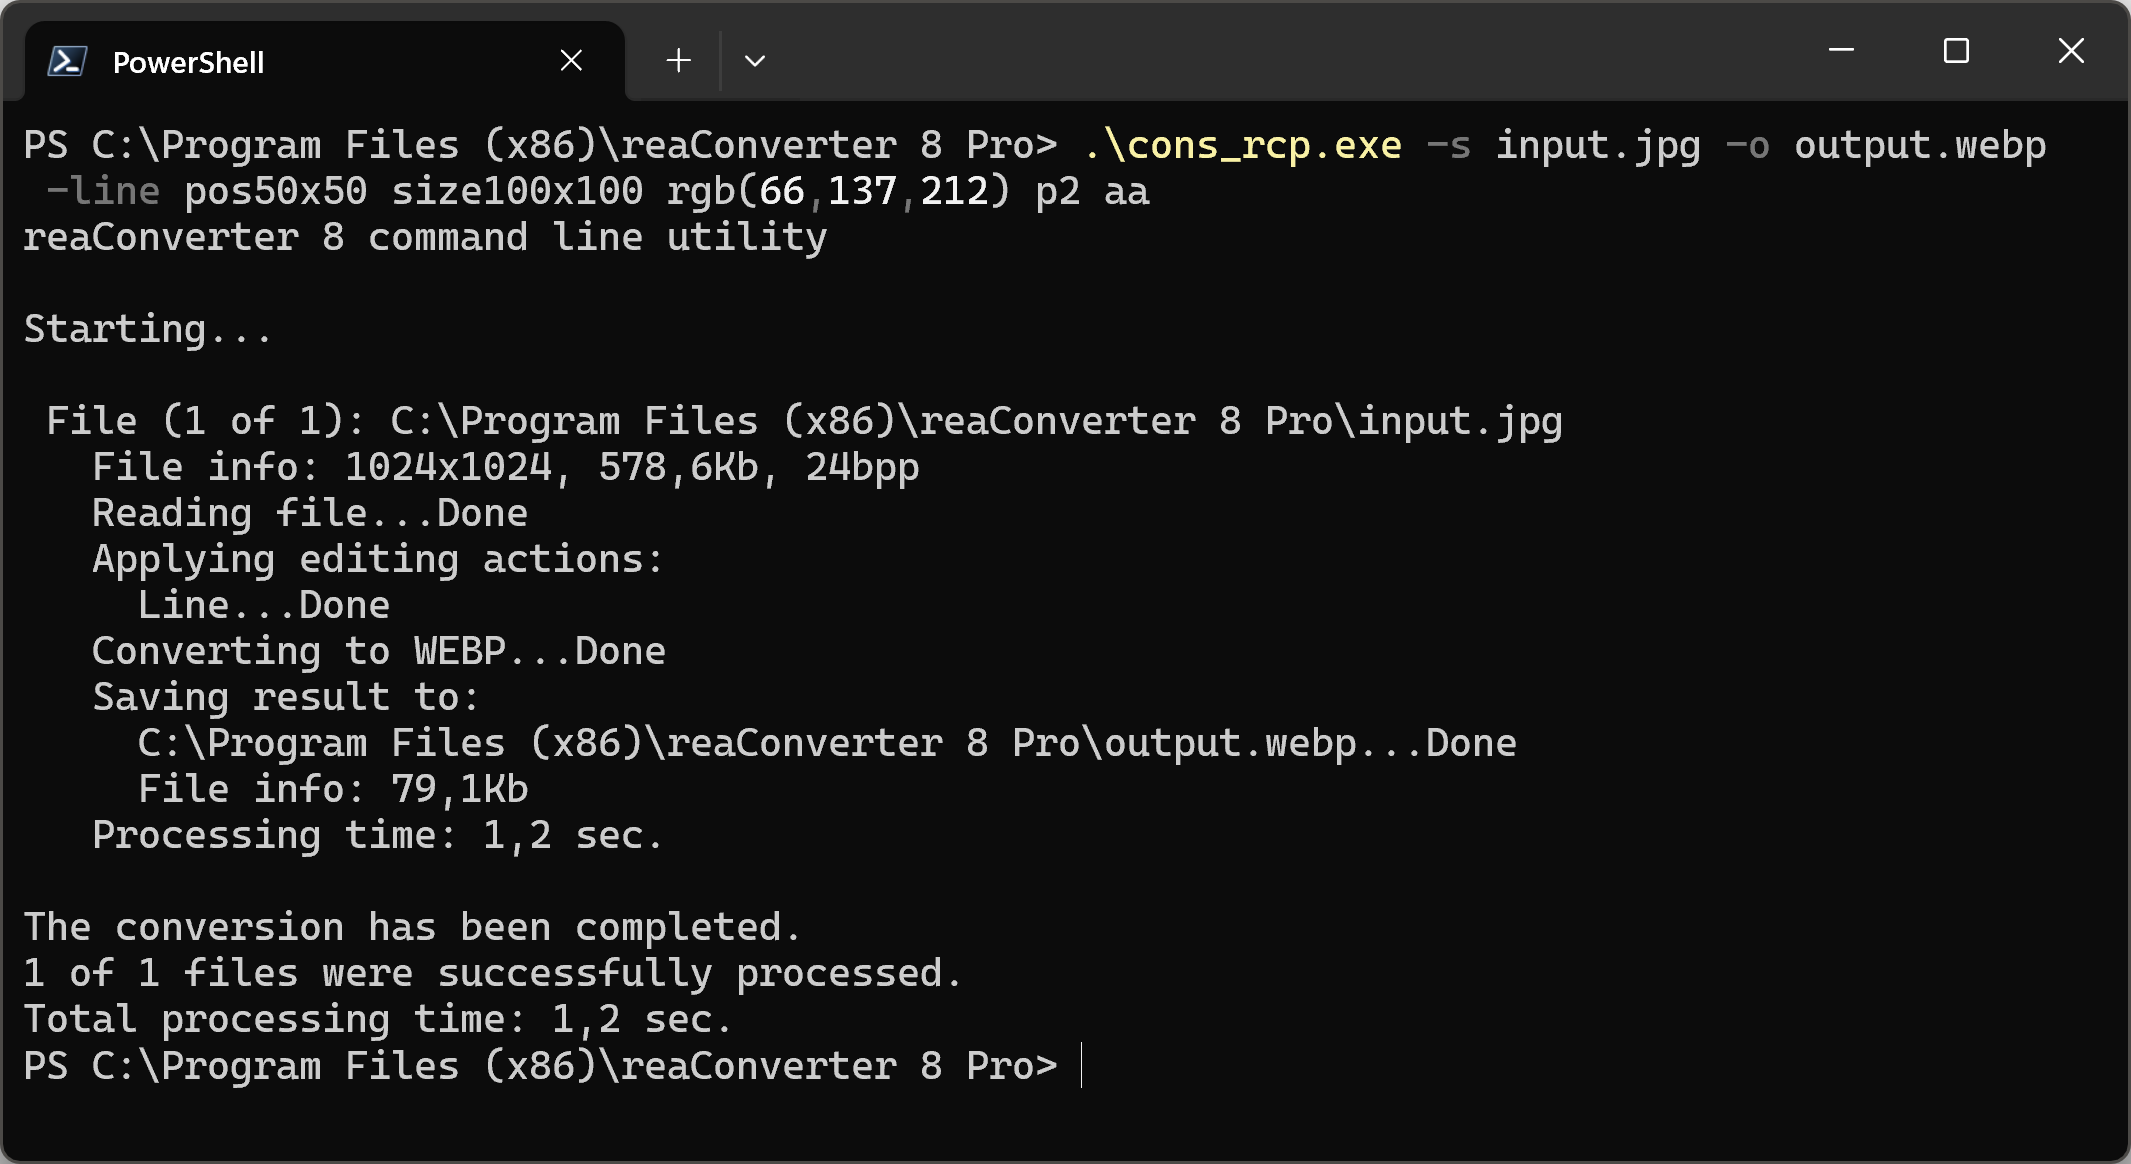
Drawing a line example:
cons_rcp.exe -s "C:\Path_to\input_file.jpg" -o "C:\Path_to\output_file.jpg" -line pos50x50 size100x100 rgb(66,137,212) p2 aa
Manual
-point (draws point)
  Optional parameters:
	  1. Point position in pixels (Syntax: pos50x50)
	  2. Point shape (Syntax: s, c)
	     where "s", "c" mean square (default), circle.
	  3. Pen color (Syntax: rgb(66,137,212), hex(4289d4))
	  4. Pen width (Syntax: p3, integer from 1)
	  5. Apply anti-aliasing (Syntax: aa, by default anti-aliasing is off)
  Example:
    -point pos50x50 rgb(66,137,212) p2 aa
-line (draws line)
  Optional parameters:
	  1. Starting point in pixels (Syntax: pos50x50)
	  2. Size in pixels (Syntax: size100x100)
	  3. Pen color (Syntax: rgb(66,137,212), hex(4289d4))
	  4. Pen width (Syntax: p3, integer from 1)
	  5. Apply anti-aliasing (Syntax: aa, by default anti-aliasing is off)
  Example:
    -line pos50x50 size100x100 rgb(66,137,212) p2 aa
-rectangle (draws rectangle)
  Optional parameters:
	  1. Position in pixels (Syntax: pos50x50)
	  2. Size in pixels (Syntax: size100x100)
	  3. Pen color (Syntax: rgb(66,137,212), hex(4289d4))
	  4. Pen width (Syntax: p3, integer from 1)
	  5. Apply anti-aliasing (Syntax: aa, by default anti-aliasing is off)
	  6. Fill inside area with color (Syntax: fill_rgb(66,137,212), fill_hex(4289d4))
  Example:
    -rectangle pos50x50 size100x100 rgb(66,137,212) p2 aa
-ellipse (draws ellipse)
  Optional parameters:
	  1. Position in pixels (Syntax: pos50x50)
	  2. Size in pixels (Syntax: size100x100)
	  3. Pen color (Syntax: rgb(66,137,212), hex(4289d4))
	  4. Pen width (Syntax: p3, integer from 1)
	  5. Apply anti-aliasing (Syntax: aa, by default anti-aliasing is off)
	  6. Fill inside area with color (Syntax: fill_rgb(66,137,212), fill_hex(4289d4))
  Example:
    -ellipse pos50x50 size100x100 rgb(66,137,212) p2 aa
You are welcome to contact our technical support when you have any questions about reaConverter.
Discover more