Rotate 3D Images

How to rotate 3D images during conversion?
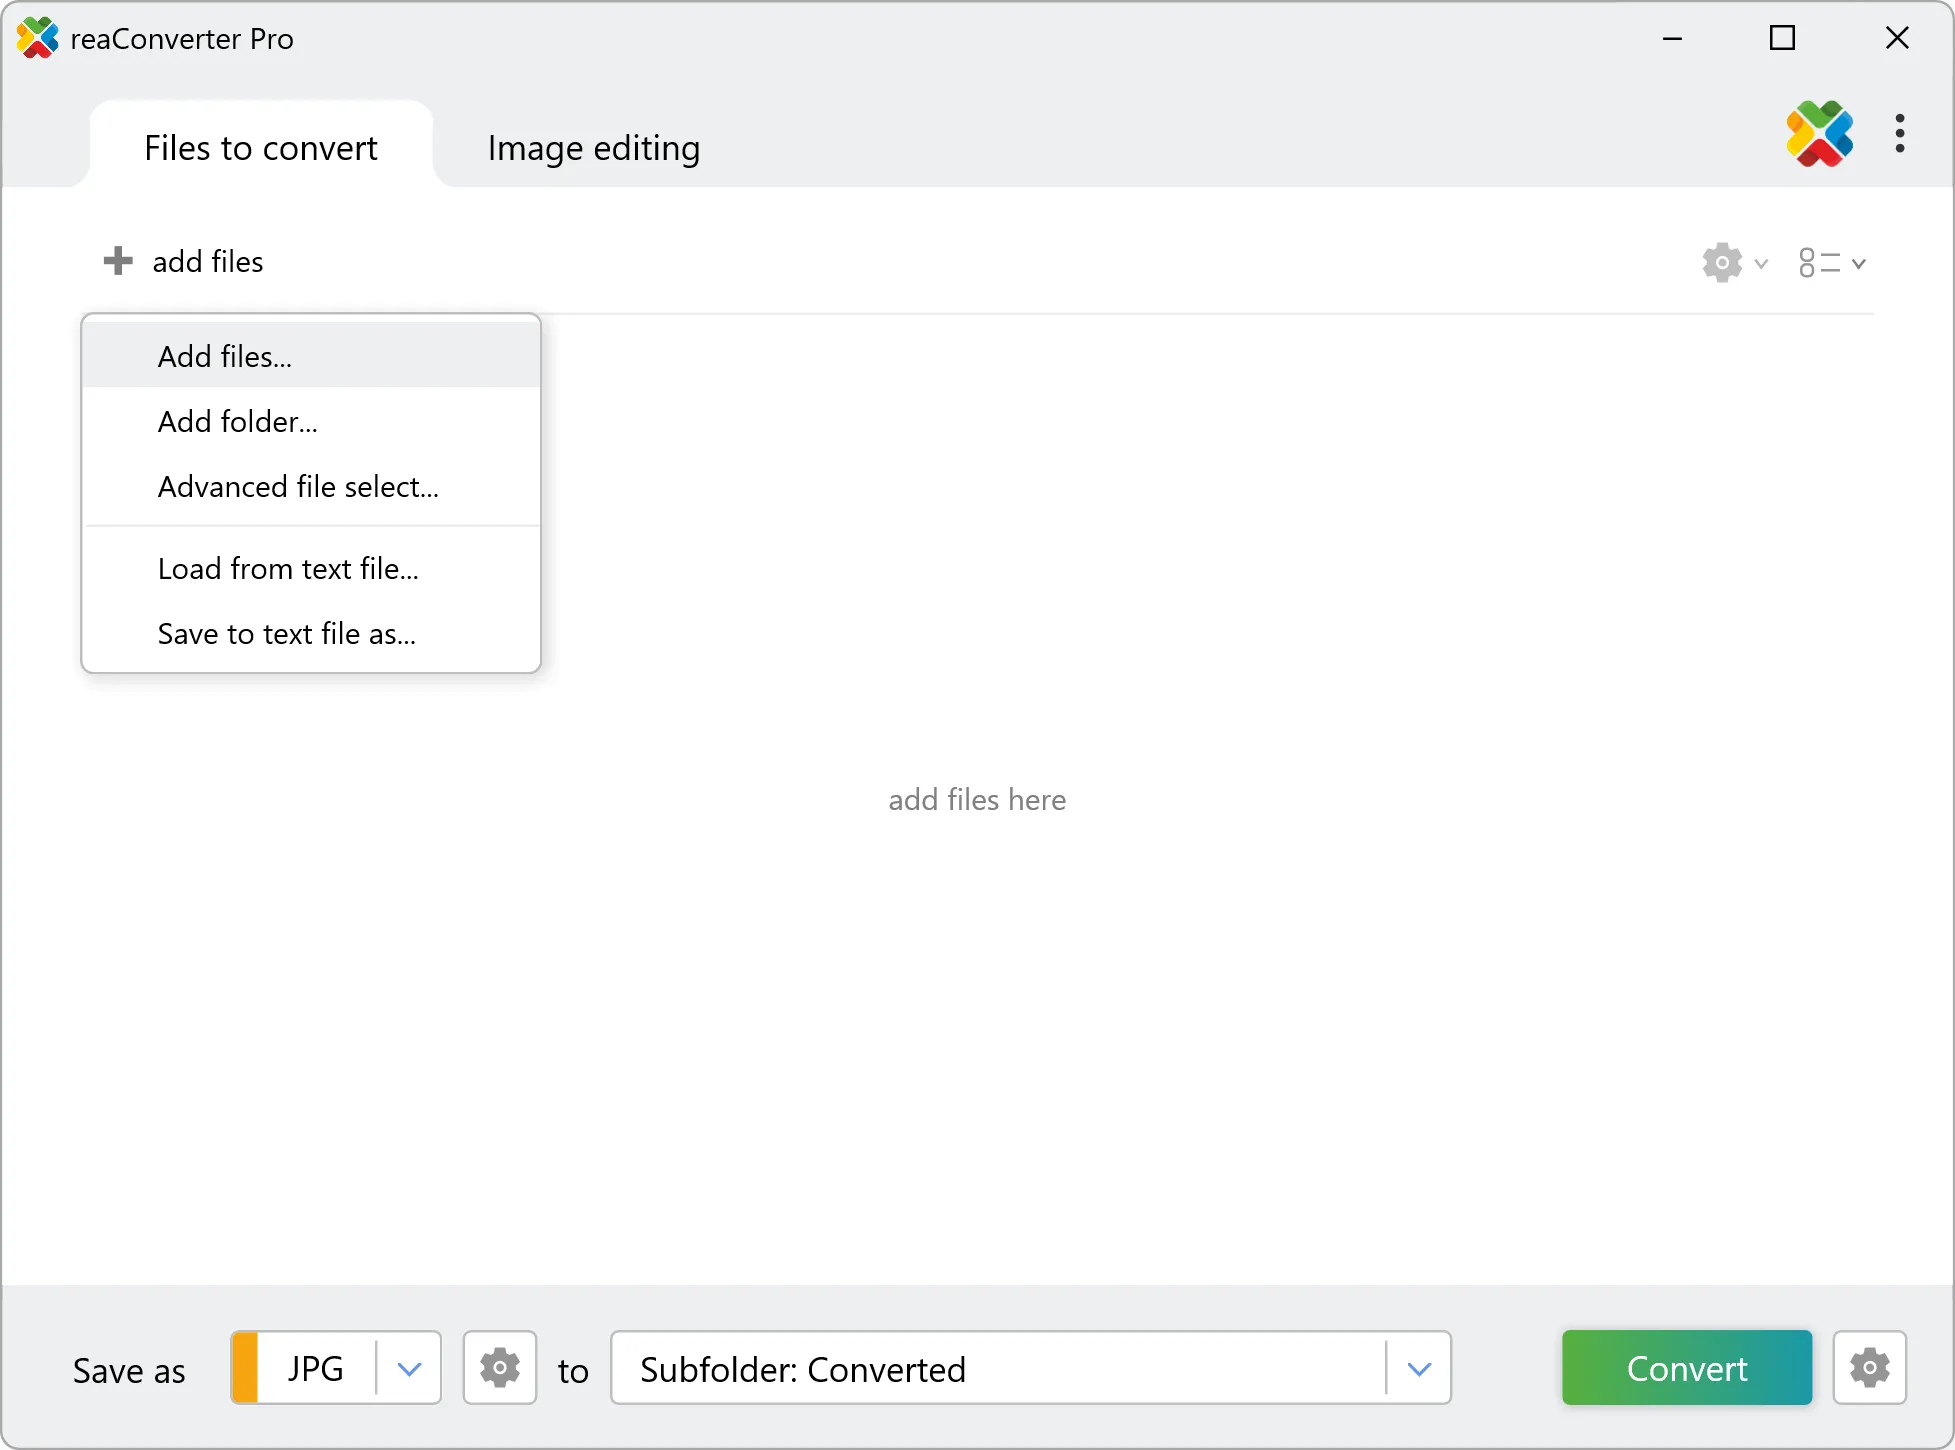
1. Open Images
Load the 3D image you intend to convert, either by manual selection from your hard drive or by using the drag-and-drop tool. You can also add entire folders or click Advanced file select and select only one or more particular 3D formats from a folder that contains several types of image formats.
2. 3D Formats Loading Settings
Go to the Menu button and then to Loading settings — 3D formats loading settings
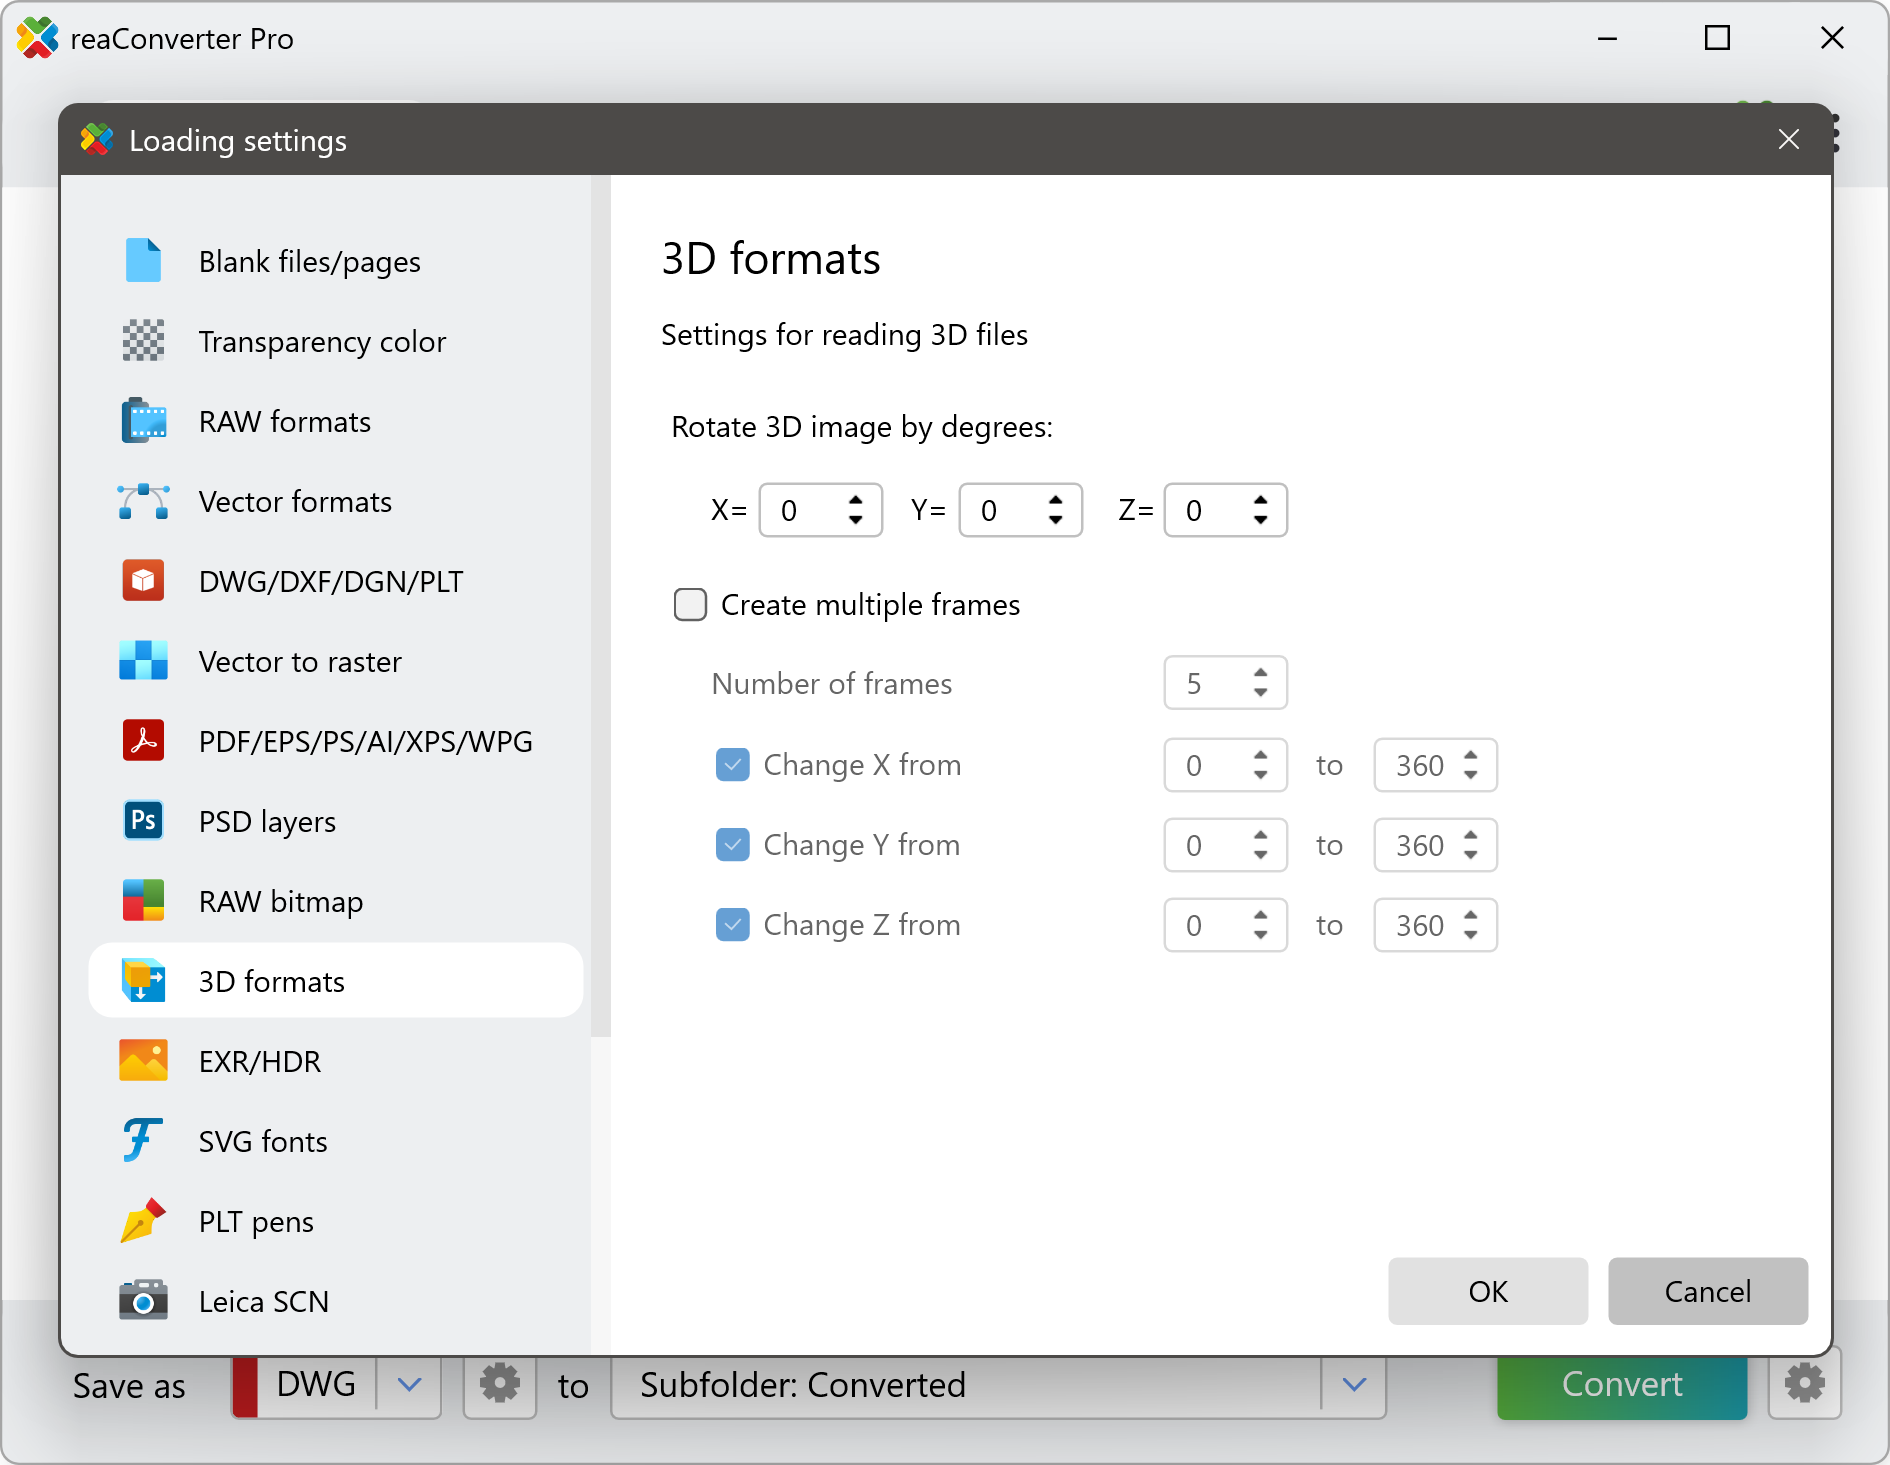
In the new window you will be able to insert figures that define 3D rotation by degrees for each the 3 axes. Depending on how you would like the output image to look, you can insert coordinates for one or more of them. For example, if you fill the cell for the X coordinate and leave the rest blank, the 3D object will get rotated only from left to right.
3. Save the Result
Finally, go to Saving options and select the location of the output files, as well as their extension. Last but not least, choose the desired output extension in the lower part of the window.
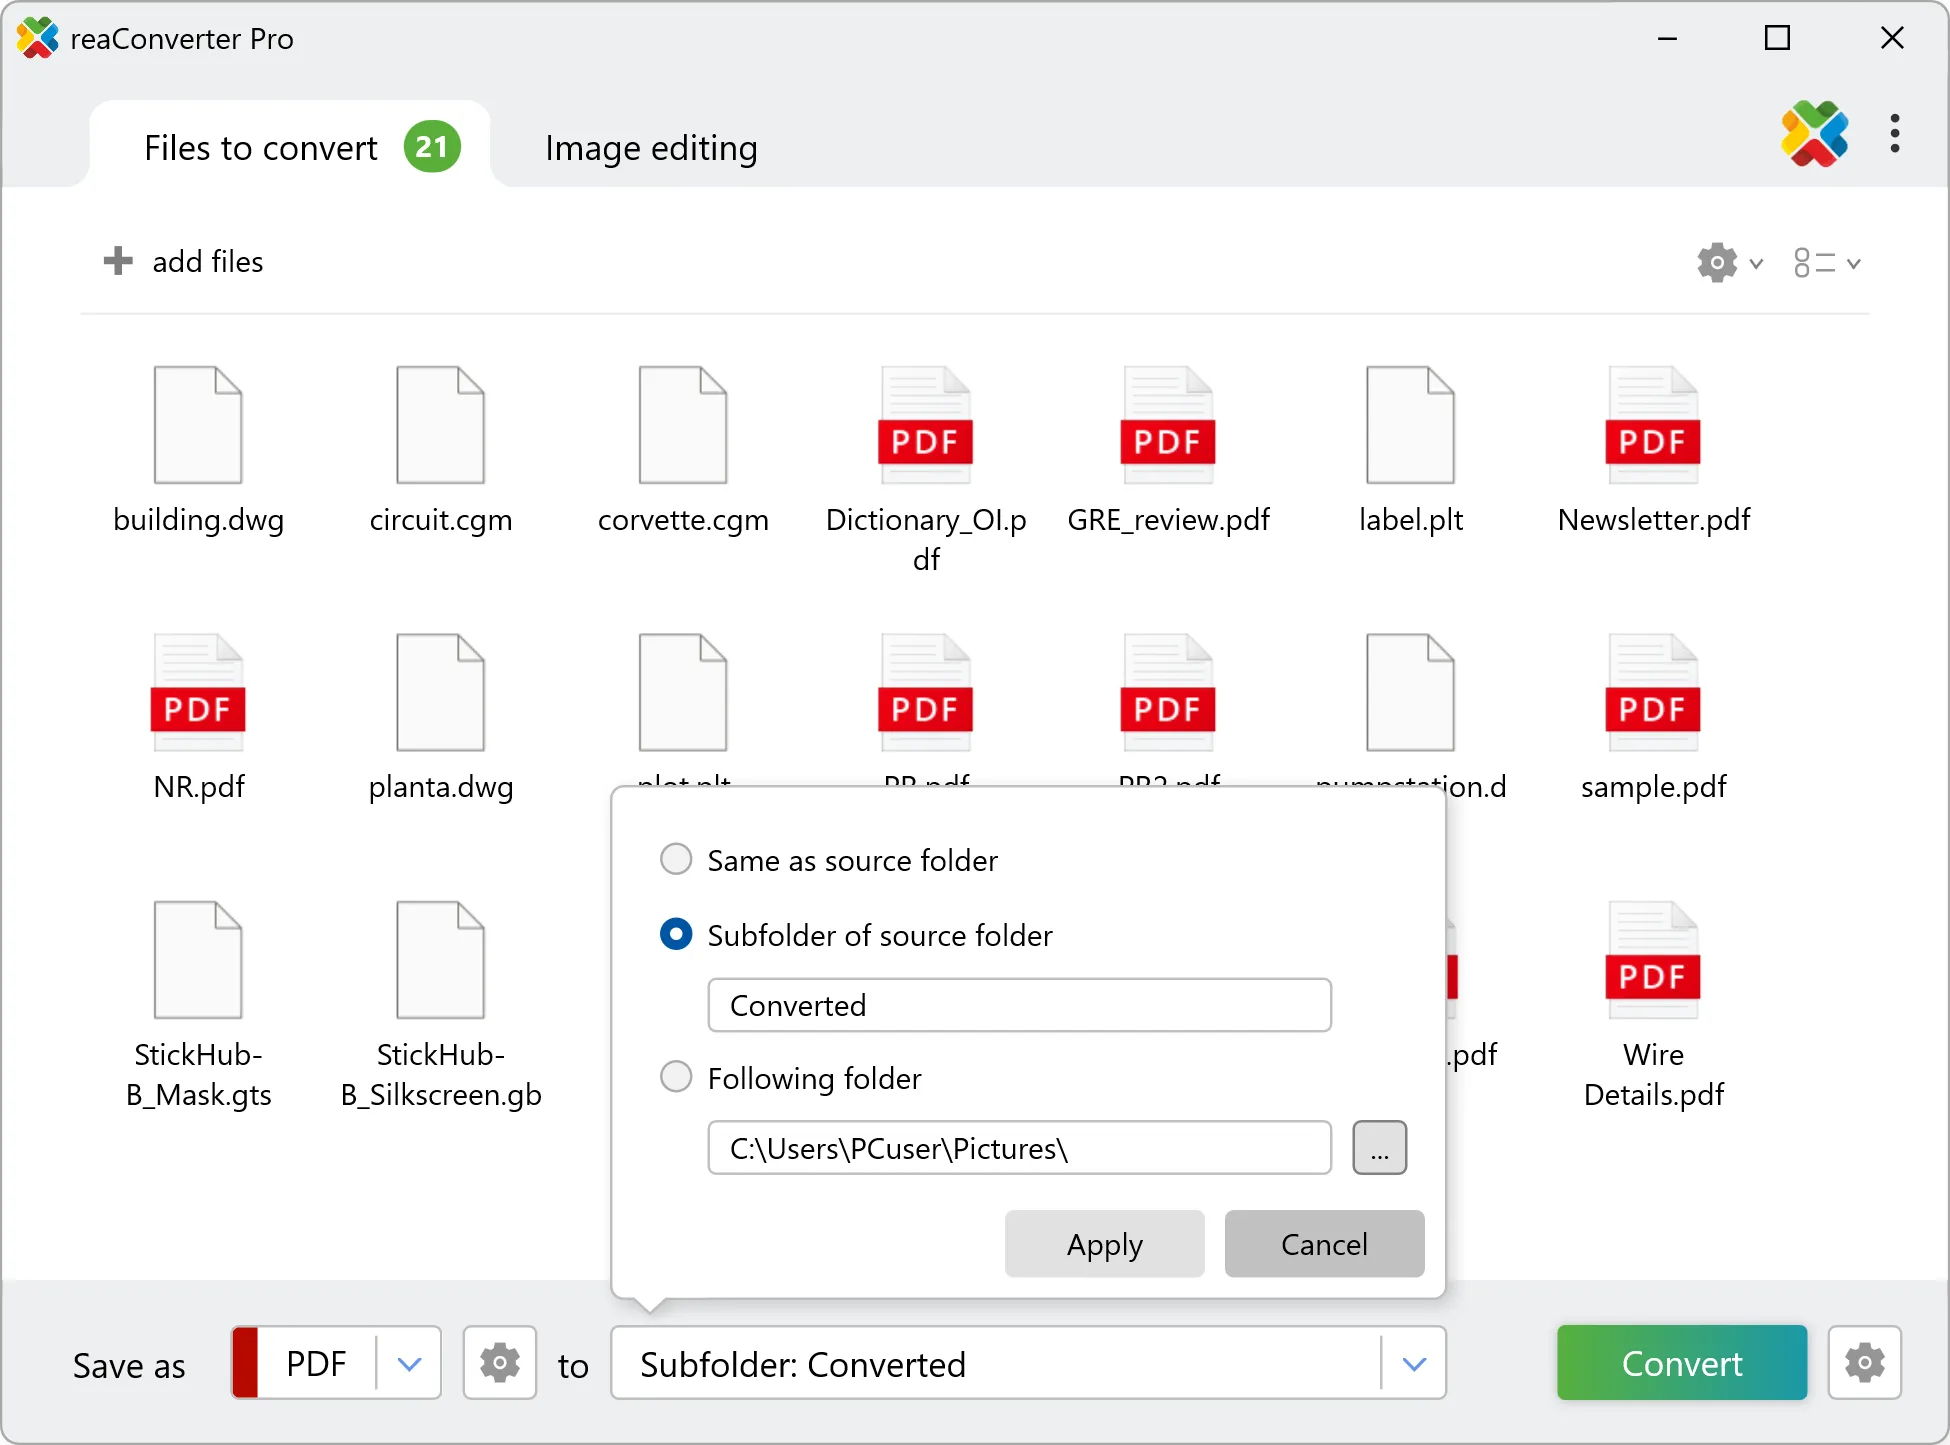
Then simply press the Convert button and your 3D rotated images will soon be done.
Convert 3D images on your PC
The fast and easy way to convert 3D formats is to use reaConverter. The software runs completely offline, keeping your files safe and private.
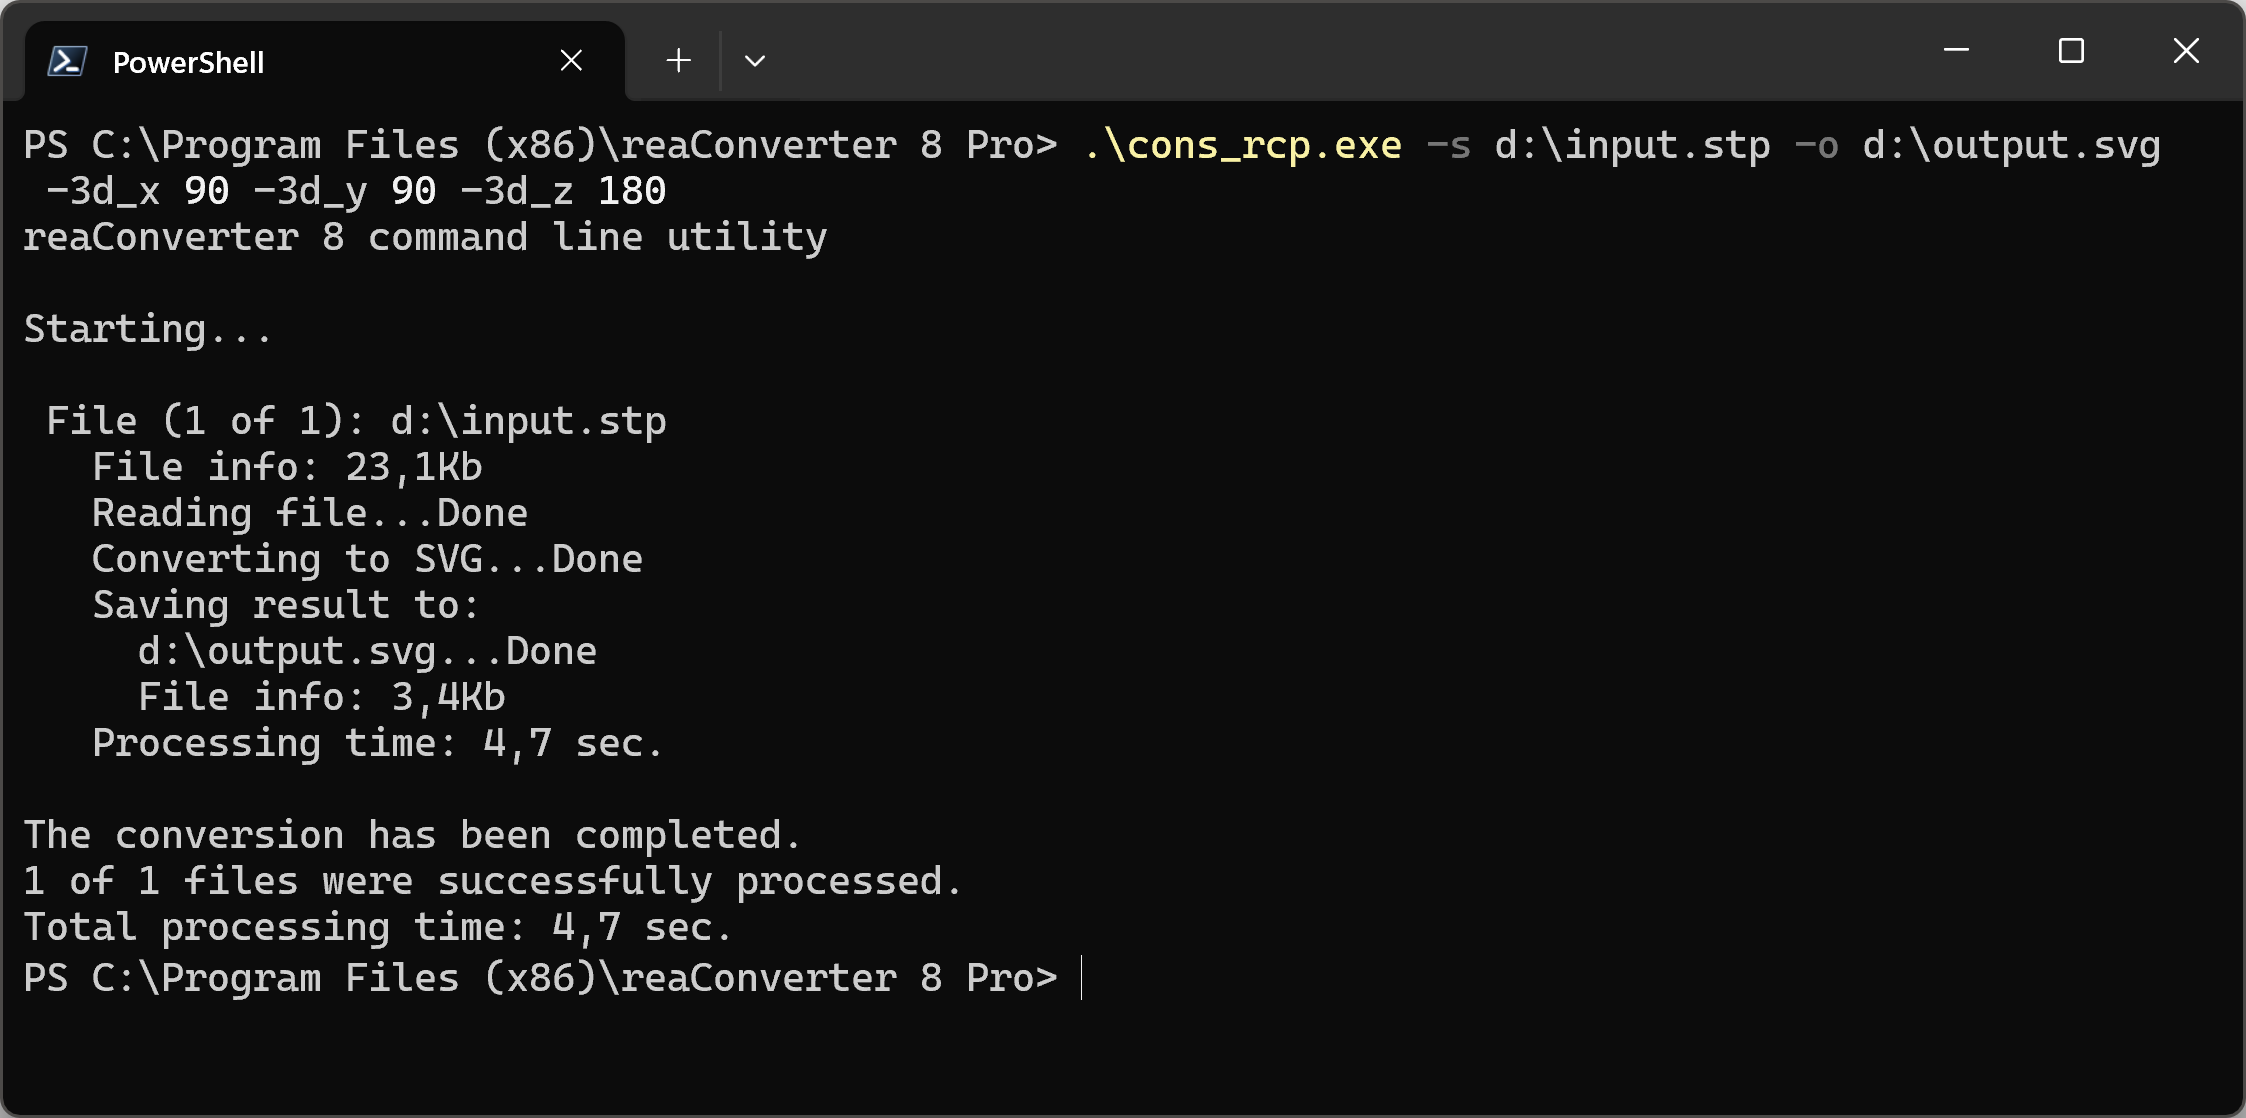
Rotate 3D images with command-line tool
You can also rotate 3D images with command-line interface, either manually or through automated scripts. reaConverter Pro includes a command-line tool called cons_rcp.exe — an advanced feature designed for professional use, available exclusively in the Pro edition.
3D conversion example:
cons_rcp.exe -s "C:\Path_to\input_file.stp" -o "C:\Path_to\output_file.png" -3d_x 90 -3d_y 90 -3d_z 180
Manual
-3d_x
  where value = angle (from 1 to 360 degrees) to rotate 3D image about x-axis
-3d_y
  where value = angle (from 1 to 360 degrees) to rotate 3D image about y-axis
-3d_z
  where value = angle (from 1 to 360 degrees) to rotate 3D image about z-axis
You are welcome to contact our technical support when you have any questions about reaConverter.
Discover more